Create and manage items in Pimics
Pimics works with the standard Business Central items. They are extended by additional fields and related tables.
All processes described for items in Microsoft documentation also work with the Pimics extension. Some of these processes are expanded by Pimics. To manage complex product data, Pimics adds new processes.
New item pages
To streamline work with product data, we added our own PIM-optimized versions of the item list and item card to the Pimics user role. Since they are intended for PIM-focused users, these custom pages focus on the PIM-related data processes described below.
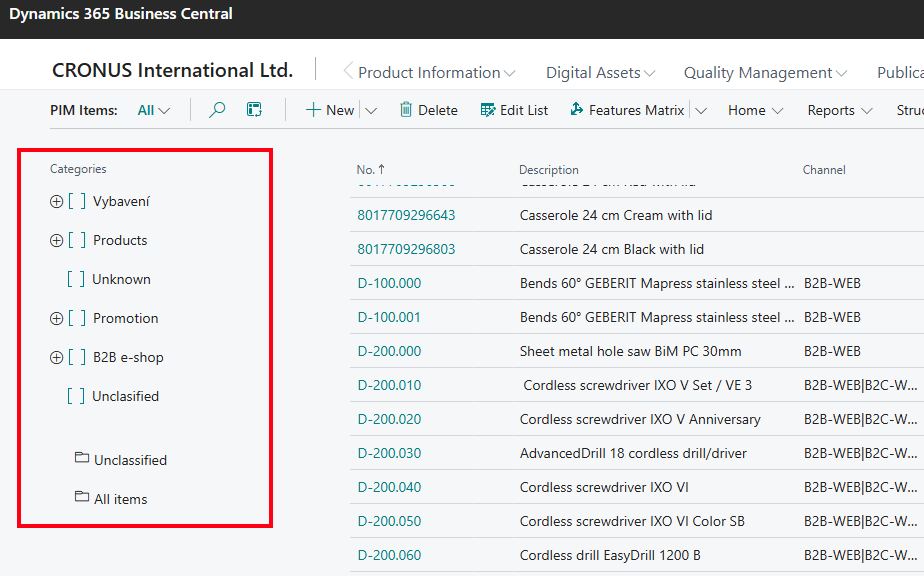
The PIM Items List
This page is similar to the standard ERP item list, but it includes a view of the product category tree on the left, which is useful when working with the product data structure. It displays only the item data that is relevant from a PIM user's point of view, bringing the necessary parameters within reach and creating a simpler, more productive experience.
The PIM Item Card
Managing extended product data can, for the most part, be done directly on the item card or started from the item card. The PIM Item Card is another example of how we optimized the user interface for managing product information inside the Pimics user role. It is similar to the ERP's default Item Card, but it contains only information that is relevant from a PIM point of view. From the PIM Item Card, you can access Business Central's default item card by going to Item > Open Standard Item Card.
Below you will find the main Pimics functionality available on the PIM Item Card.

- Basic item data: Item no., ERP description, GTIN number.
- Important PIM data: Here you can see at a glance the high-level PIM parameters of the current item, such as certification status, default checklist, allocated publication channels, category information, the main picture, and whether the item has translations.
- Product descriptions: Here you can manage product texts, whether long or short, in Rich Text format. They can include a brief description for an online shop, a long description, marketing texts, standard safety descriptions inherited from the product category, and more.
- Product features: Here you define the product features, such as dimensions, color, weight, and more.
- Translations: Here you can manage all translations needed for the current product. This is especially useful when you make your product catalog available in multiple markets and languages.
- Pictures: Here you can manage product pictures and graphics.
- Control: This section mainly covers inheritance. Modifying these parameters tells Pimics whether the current item inherits descriptions, features, keywords, pictures, documents, and other data from categories above.
Item lifecycle
Here is a short example of the complete lifecycle of an item. It does not go into detail and does not explain how to create features, texts, pictures, and other item data. This process also assumes that Pimics has already been configured, so categories, checklists, and publications are already defined.
New item process
- Search for PIM Items and select the related link.
- Expand the categories until you find the item group that you want to use for the new item.
- Under New, select New Child Item.
- Before the Item Card opens, a pop-up may appear so you can select a template.
- The new item is assigned to the selected group and inherits its data. For more details, see inheritance. For example, the item can inherit the description from the parent item group.
- Complete the item data as needed.
- To assign the item to channels, select the Assign to Channels action.
- On the list of channels, select one or more lines where the item will be available.
- After you close the page, the Channel field shows the new values.
- To verify that you have not missed anything, select Certify. This checks the data against the assigned checklists.
- A new value should appear in the System Status field.
- If it is Certified, you can continue.
- If it shows another value, such as Process or Partially Certified, review the details in the Certification Log and Channels FactBoxes.
- After everything is ready, synchronize the item with publications by selecting Reorganize Publications.
- On the list of publications, select one or more lines where the item should be updated immediately.
Bulk edit items
Use this feature to edit predefined fields on multiple Items at once.
Available predefined fields:
- Description,
- Description 2,
- Checklist Number,
- Manufacturer Code,
- Brand,
- Picture Document ID.
Different values
If a predefined field contains at least one value that differs from the others, that field is marked with the value |*|. This indicates that at least one selected item has a different value in that field. Fields Description and Description 2 are text fields. A prefix is the part of the string that appears before the |*| symbol. A suffix is the part of the string that appears after the |*| symbol.
Note
For items with descriptions Item 1, Item 2, Item 3, ...
| Item< space > | is considered a prefix.
For items with descriptions 1mm tube, 2mm tube, 3mm tube, ...
|mm tube| is considered a suffix.
Caution
Prefix and suffix cannot be applied in the same text field during a single edit.
In the remaining fields, you can select a value for the edited items. The selected value is assigned to all items in the current bulk edit. A mass delete occurs when the value is left blank.
Add prefix/suffix to multiple item descriptions
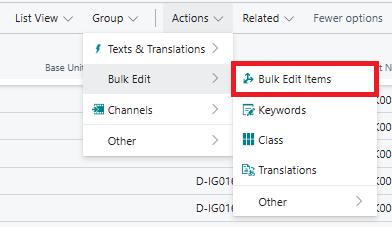
- In the PIM Items list, select the items you want to edit.
- Under Actions, go to Bulk Edit and select Bulk Edit Items.
- In the Description field on the Item Bulk Card, enter:
- Prefix text before the |*| symbol.
- Suffix text after the |*| symbol.
- Close the Item Bulk Card.
Note
To see the changes, refresh the page.
Define items for cross-sales and upsells
To define cross-sales and upsells, Pimics uses the Cross References table. A cross reference is a link of a specific cross-reference type between reference types. It is possible to attach another item or category to an item or category, even if it is not in the same part of the structure. This can represent, for example, an accessory, component, spare part, or another related type.
The cross-reference type can be defined as follows:
- Components
- Substitute Part
- Accessory
- Option
- Following Entry
- Similar Items
- Country Item
- Base Item
Reference types that can be used in cross references are:
- Item
- Item Group
- Product Group
- Catalog Group
- Document
- Text
- New Page
- Chapter
Assign Similar Item
- Open the PIM Item Card.
- Under Product Data, click Cross References.
- Select Similar Item as the Cross-Reference Type.
- As Line Type Reference, select Item.
- Under Number, select the item you want to refer to.
Translations
To transfer translations from Pimics to Business Central so that item translations can be used on invoices:
- Using Alt + Q, search for Catalog Setup.
- In the General section, find the Exchange Item Translations field.
- Set it to Always.
Note
Translations are synchronized only from this point onward.