SharePoint as Digital Asset Management for Pimics
How to set up a Pimics-SharePoint integration
When using SharePoint as a file repository, every time you upload a digital asset to Pimics the document will be stored in SharePoint's library and a preview of the document will be created in Pimics.
Each document type can have its own separate library (Pictures, Documents, Graphics, Media). All libraries have to be on the same SharePoint site.
Steps
- SharePoint as Digital Asset Management for Pimics
Create a SharePoint site
The best practice is to have a dedicated site for Pimics, you can simply call it Pimics or DAM. Please refer to Microsoft's documentation for details on site creation.
Our suggestion is to create separate document libraries for Documents, Pictures, Graphics, CAD Drawings and Media, but you can also use one library for several document types.
Create an application in Azure Active Directory
To communicate with SharePoint, Pimics needs to have an application in Microsoft Entra ID. Usually we use single-tenant for customer-managed applications, and Pimics also supports multi-tenant applications for partners.
- Create a new application
- You can follow the steps in Microsoft's online documentation: Register a new application using the Azure portal
- Keep Redirect URI empty
- Open https://portal.azure.com/, search for Microsoft Entra ID (formerly Azure Active Directory), open the related link, in the left menu select Manage -> App registration and your application from point 1 (or you can go through Add -> App registration).
- Set permissions for the application
- In the app details, go to API permissions
- Select Add a permission
- Since Pimics uses Microsoft Graph API to access SharePoint, select Microsoft Graph and then Application permissions
- Select these permissions from the list:
Sites.ReadWrite.All(Application) - Read and write items in all site collections and libraries
Note
These permissions:
- Provides sufficient permissions for all Pimics DAM operations
- Allows Pimics to search sites, read/write files, create folders, and manage thumbnails
- Most common choice for production environments
Alternative: Site-specific permissions If you want to limit access to specific SharePoint sites instead of all sites, use
Sites.Selectedinstead ofSites.ReadWrite.All. This requires additional configuration steps - see Give access to specific sites only below.
In this permissions:- Limits access to only specific SharePoint sites you explicitly grant
- Requires additional PowerShell configuration to grant site-specific permissions
- Recommended when following principle of least privilege
- Best for multi-tenant scenarios or when Pimics should only access dedicated DAM sites
What Pimics does with these permissions:
- Search and list SharePoint sites and document libraries
- Upload files (documents, images, media) to SharePoint libraries
- Download files and thumbnails for preview generation
- Update existing files when content changes
- Rename files and manage folder structures
- Read file metadata (name, size, MIME type, modification dates)
- Create and manage thumbnails for images
- Track file changes using delta queries for synchronization
- Select action Grant admin consent for ...
- Generate a new secret for the application
- In the app details, go to Certificates & secrets
- In the Client secrets group, select action New client secret
- On the new page, select an appropriate duration in Expires (Microsoft no longer supports unlimited duration)
- Select Add to create the secret
- On the certificates page, you can see the client secret in Value. Copy it and store it together with the client ID, because you will not be able to recover it later from Azure Active Directory
- When the secret expires, you'll have to create a new one and change the connection values in Pimics
Give access to specific sites only
If you want to limit the access to the Microsoft Entra Application to specific SharePoint sites only, follow the steps below. This uses the Sites.Selected permission instead of Sites.ReadWrite.All or Sites.FullControl.All.
When to use this approach:
- You follow the principle of least privilege
- Pimics should only access dedicated DAM sites, not all SharePoint sites in your tenant
- You have compliance or security requirements to restrict application access
- You want to explicitly control which sites the application can access
Setup steps:
- First, follow the steps in Create an application in Azure Active Directory
- At step 3.4 (selecting permissions), choose
Sites.Selected(Application) instead ofSites.ReadWrite.AllorSites.FullControl.All - Grant admin consent for the permission
Unfortunately, there is no user interface to grant site-specific access to an application. You must use PowerShell to grant the application access to individual sites.
Using PnP PowerShell to grant site permissions:
The easiest way to grant site-specific permissions is to use PnP PowerShell.
If you don't have it, install it in PowerShell:
Install-Module PnP.PowerShell -Scope CurrentUser
When PnP is ready, you can use command Grant-PnPAzureADAppSitePermission to give permissions to the app.
Connect-PnPOnline -Url "<siteUrl>" -Interactive
Grant-PnPAzureADAppSitePermission -AppId "<AppId>" -DisplayName "<AppName>" -Permissions Write
Set the connection in Pimics
Add a new Authentication
- Choose the Search icon (or use Alt + Q), enter Pimics Authentications, then choose the related link.
- Press New to add an Authentication entry
- Select SharePoint online as Type
- Enter a preferred Code
- In group Service specify:
- ClientId - client identification from Azure Active Directory - Application (client) ID on the Azure app overview
- ClientSecret - client secret from Azure Active Directory, saved earlier
- Tenant - if you use Business Central SaaS it is the tenant ID, this can also be a valid PageURL or Domain - Directory (tenant) ID on the Azure app overview
Note
The fields Login Url, Resource and Scope will be filled in automatically 4. If you want to use this Authentication as default then activate the Default checkbox
Add a new SharePoint Domain
- Choose the Search icon (or use Alt + Q), enter Domain Repository Setup, then choose the related link.
- Press New to add a Domain Repository Setup entry
- Enter a preferred Code
- Select SharePoint as Repository Type
- Select the Pimics authentication created earlier as the Default Authentication
- Set the Tenant - if you use Business Central SaaS it is the tenant ID, this can also be a valid PageURL or Domain
- Use lookup in Site to select a site from SharePoint. The lookup will provide a list of available sites on your SharePoint and can be used to test the connection
Add the SharePoint domain to Document Setup and set up libraries for different document types
- Choose the Search icon (or use Alt + Q), enter Document Setup, then choose the related link.
- Select SharePoint in Repository Type
- Select the Default Domain created earlier - this will fill in the following values with the values from the selected domain
- In group Repository Location use lookup to select individual libraries for each document type, like in the example below:

- Select OK to close the page and finish the setup
Initial synchronization of files from SharePoint to Pimics
For initial and periodic synchronization steps, use the dedicated guide:
Public links
Pimics can generate public links for content residing in SharePoint. Files from SharePoint are read through the application, so everybody with the link can read a file from the library.
For testing this functionality we offer a public service under https://pimics-shpimages-dev-8i.azurewebsites.net. This is not a service for productive environments, because it runs with limited resources.
Warning
We reserve the right to rename, move, or delete the service (https://pimics-shpimages-dev-8i.azurewebsites.net) without prior notice.
For productive environments we offer 2 options:
- Service hosted & managed by Allium
- Azure subscription with your own service and advanced configuration like Azure CDN (Content Delivery Network)
Get public links for files
In Pimics, the primary setting for the Azure CDN domain/URL resides in the Document Setup page, together with the SharePoint domain setup. There are two fields for this, and they are highlighted in the picture below.

The CDN Azure URL can be taken from Azure once the CDN service is configured there.
As for the Azure Customer ID, it is a GUID unique to Pimics that identifies the CDN environment for a particular company. When clicking on the three dots at the right side of the field, a new Azure Customer ID will be generated. If more companies need to share the same SharePoint/CDN environment, they will need to have the same Azure Customer ID set up in their respective Pimics instances.
This will create the necessary authentication parameters, stored in Azure not the local BC, so that CDN will be able to access your Pimics SharePoint library.
Using Alt+Q access Domain Repository Setup. Select your current SharePoint domain, then click on Create SharePoint Client as highlighted below:

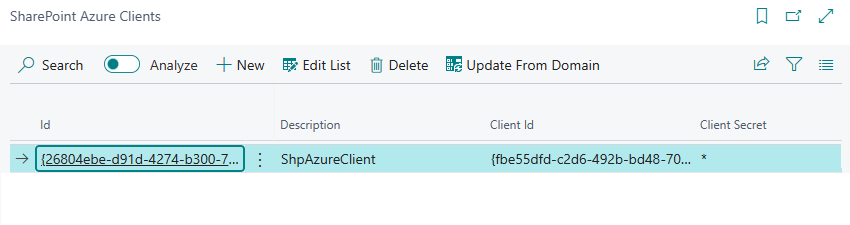
If you search for SharePoint Azure Clients with Alt+Q, you will now be able to see your newly created Azure credentials for SharePoint:
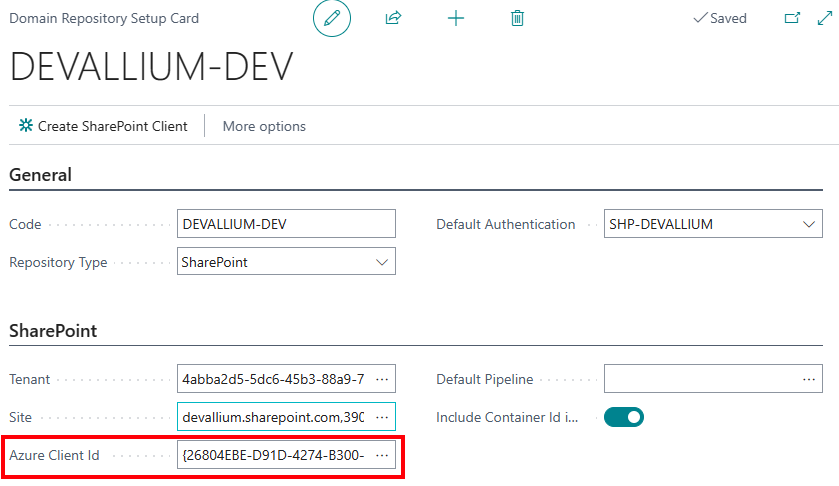
Back to the Domain Repository Setup, you will need to access your domain repository setup card, and set your newly created Azure Client ID in the relevant field highlighted below:
Update public links on digital assets
After setting up CDN, all that remains is updating public links for the desired digital assets to reflect the new access policy. First select these digital assets (pictures, documents, etc.), then run Refresh Metadata. See Refresh public links for details.