Exporting to various channels
Exporting files to a predefined Sharepoint folder
As a prerequisite, the document repository type should be configured to Sharepoint in Document Setup.
Here are the steps for configuring both the publication channel and the publication itself, for exporting an Excel file to a predefined Sharepoint repository:
- Access the publication channels list by pressing Alt+Q and then searching for ’publication channels’ and selecting the appropriate link
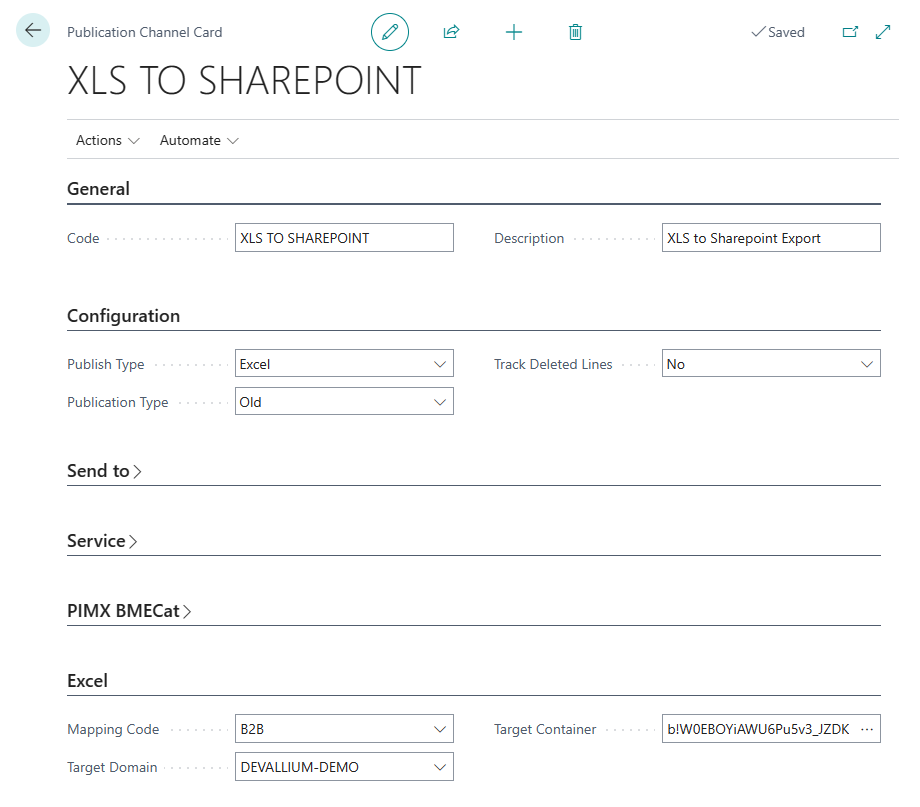
- In the publication channels list, press +New to create a new export channel to be used for this purpose, and name it accordingly. For the sake of this tutorial, we have named it ’XLS TO SHAREPOINT’ as can be seen in the picture below:

- Publish Type must be set to ’Excel’
- In the Excel section, the field Target Domain must be set to your Default Domain from Document Setup. Field Target Container must be set to the Sharepoint document library where the output should be stored
- Access the publications list by pressing Alt+Q and then searching for ’publications’ and selecting the appropriate link
- In the publications list, press New to create a new publication for your Excel export to Sharepoint. Use the Excel template if asked.
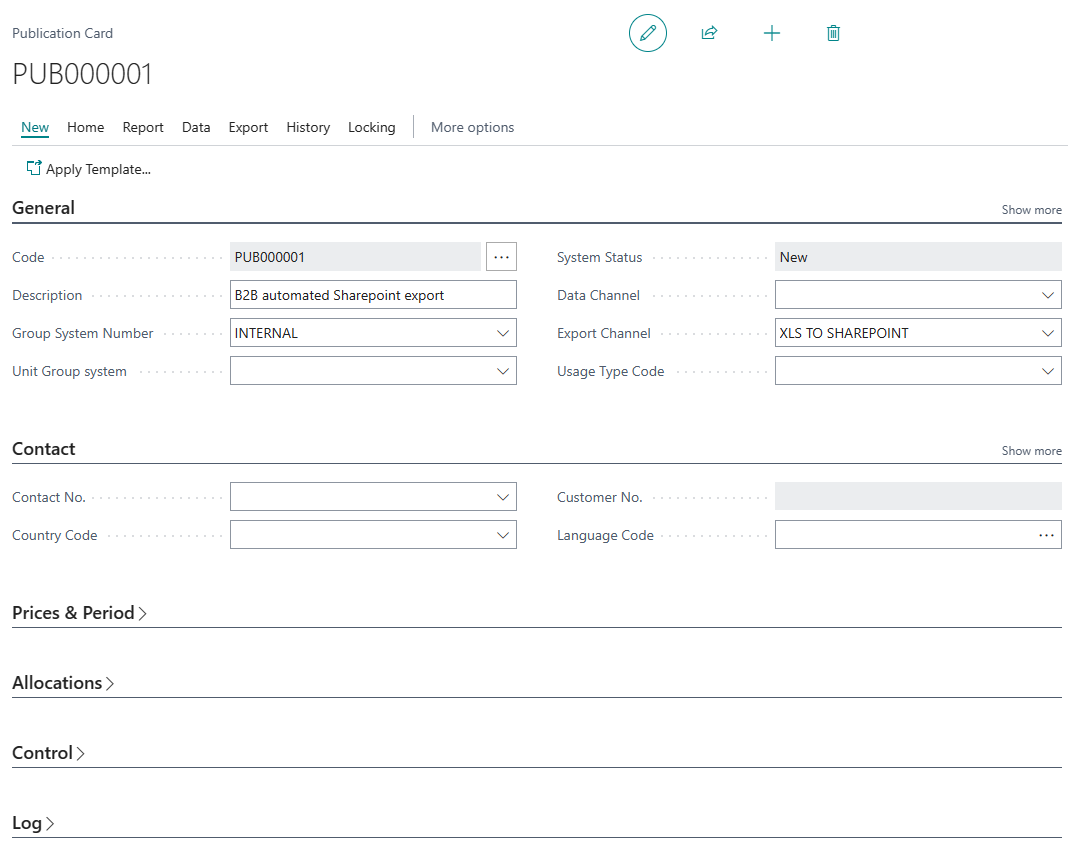
- For our example, we have named our new publication ’B2B automated Sharepoint export’ as can be seen in the picture below:

- In field Export Channel, the newly created publication channel (’XLS TO SHAREPOINT’ for our current example) must be selected
- Set any other publication parameters as needed
Once the publication is defined, file export can be done either manually (triggered by the user) or automatically using the job queue. Here are the steps for both approaches:
Manual export:
- From the publication card previously created, access Home > Publish then confirm with Yes
- Upon successful completion of the export, you will get a confirmation message from the system
- If for any reason writing the file to the Sharepoint repository is not successful, you will be asked by the system if you prefer to download the file to the local computer
Automated export:
- Access the job queue entries list by pressing Alt+Q and then searching for ’job queue entries’ and selecting the appropriate link
- Press +New to create a new job and set Codeunit in field Object Type to Run.
- Field Object ID to Run should be set to 70113790
- Field Parameter String should be set to -Reorganize -Publish -CODEFILTER XXXX, where XXXX should be replaced by the publication ID
- Set any other job queue entry parameters as needed
